How Can We Help?
mRo Quad Zero Kit assembly guide
The Quad Zero Kit is a lightweight (<250g) platform with a 3D-printable frame, agile flying envelope and simple to setup. It is powered by our most popular flight controller yet, the Control Zero H7 OEM on top of custom made motors and a carrier board that includes power monitoring, integrated ESC module, Time-of-Flight sensor for precision landing (Z-axis), and additional ports to support any OSD, GPS, CAN, telemetry and any other payload peripherals.
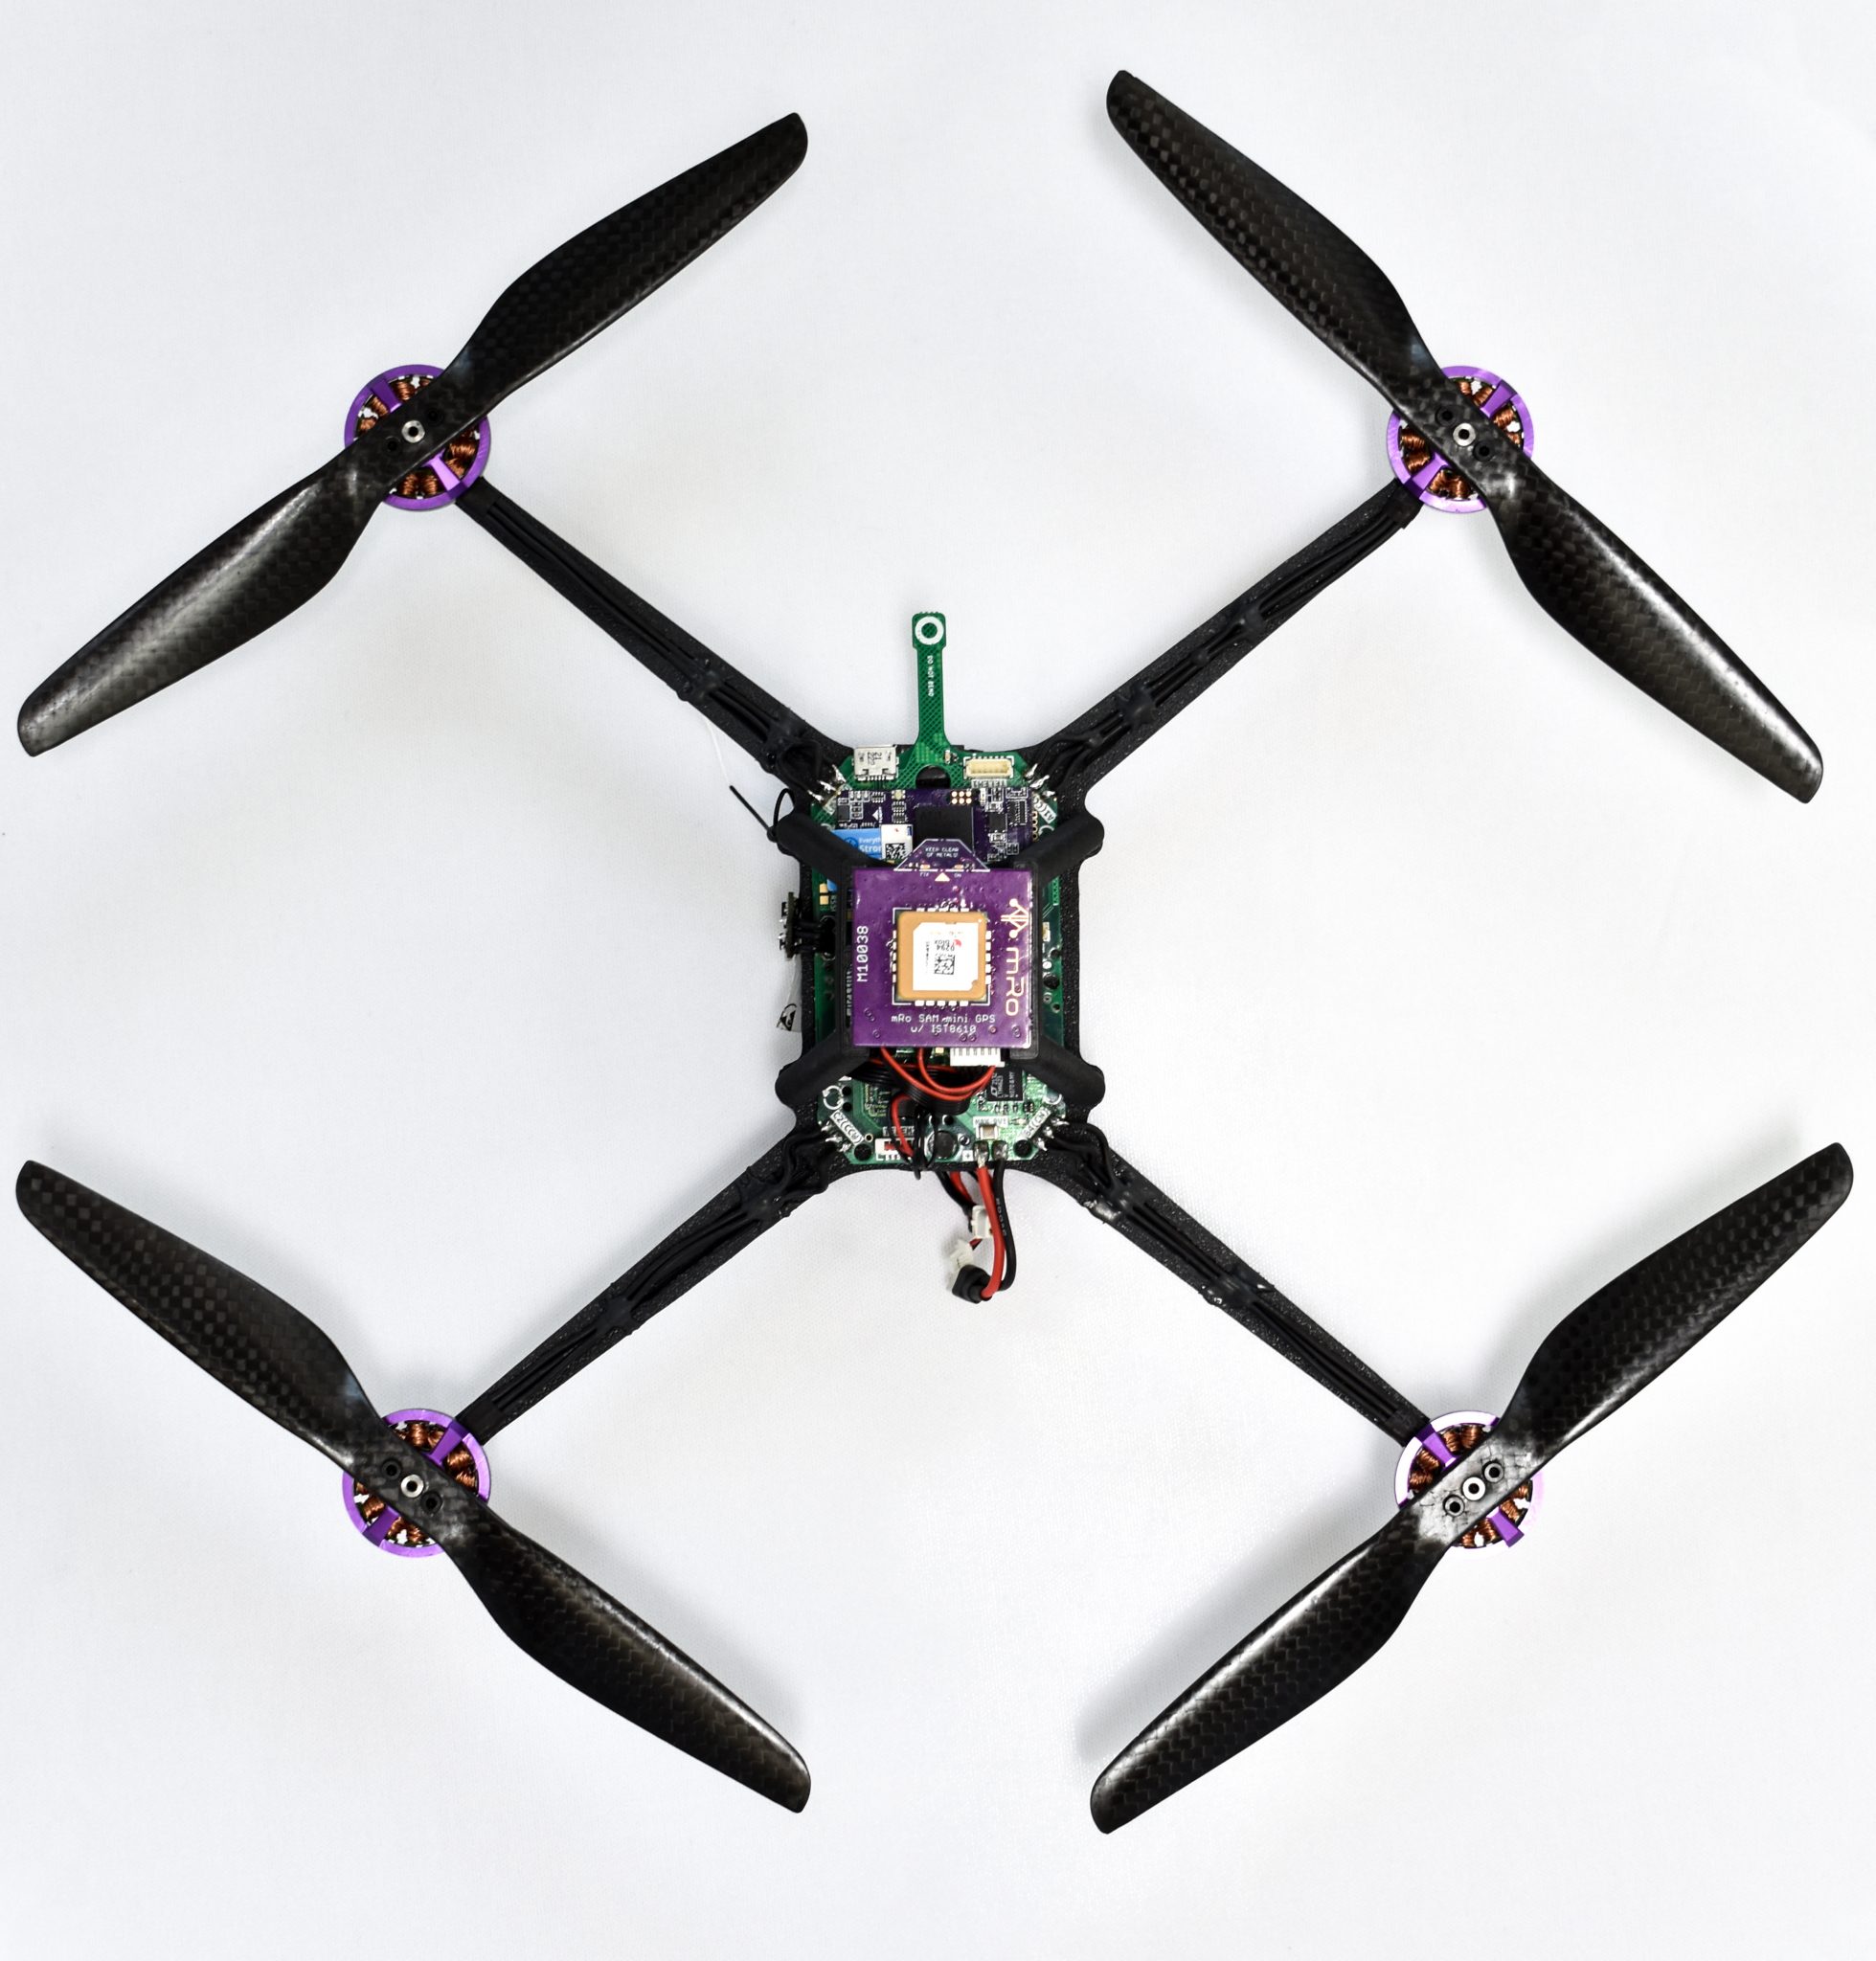
We put together this guide to help you get up and running with your QZKit platform as fast as possible. Please note that this build may take anywhere from 3 hrs to several sessions depending on your particular experience.
What’s Included
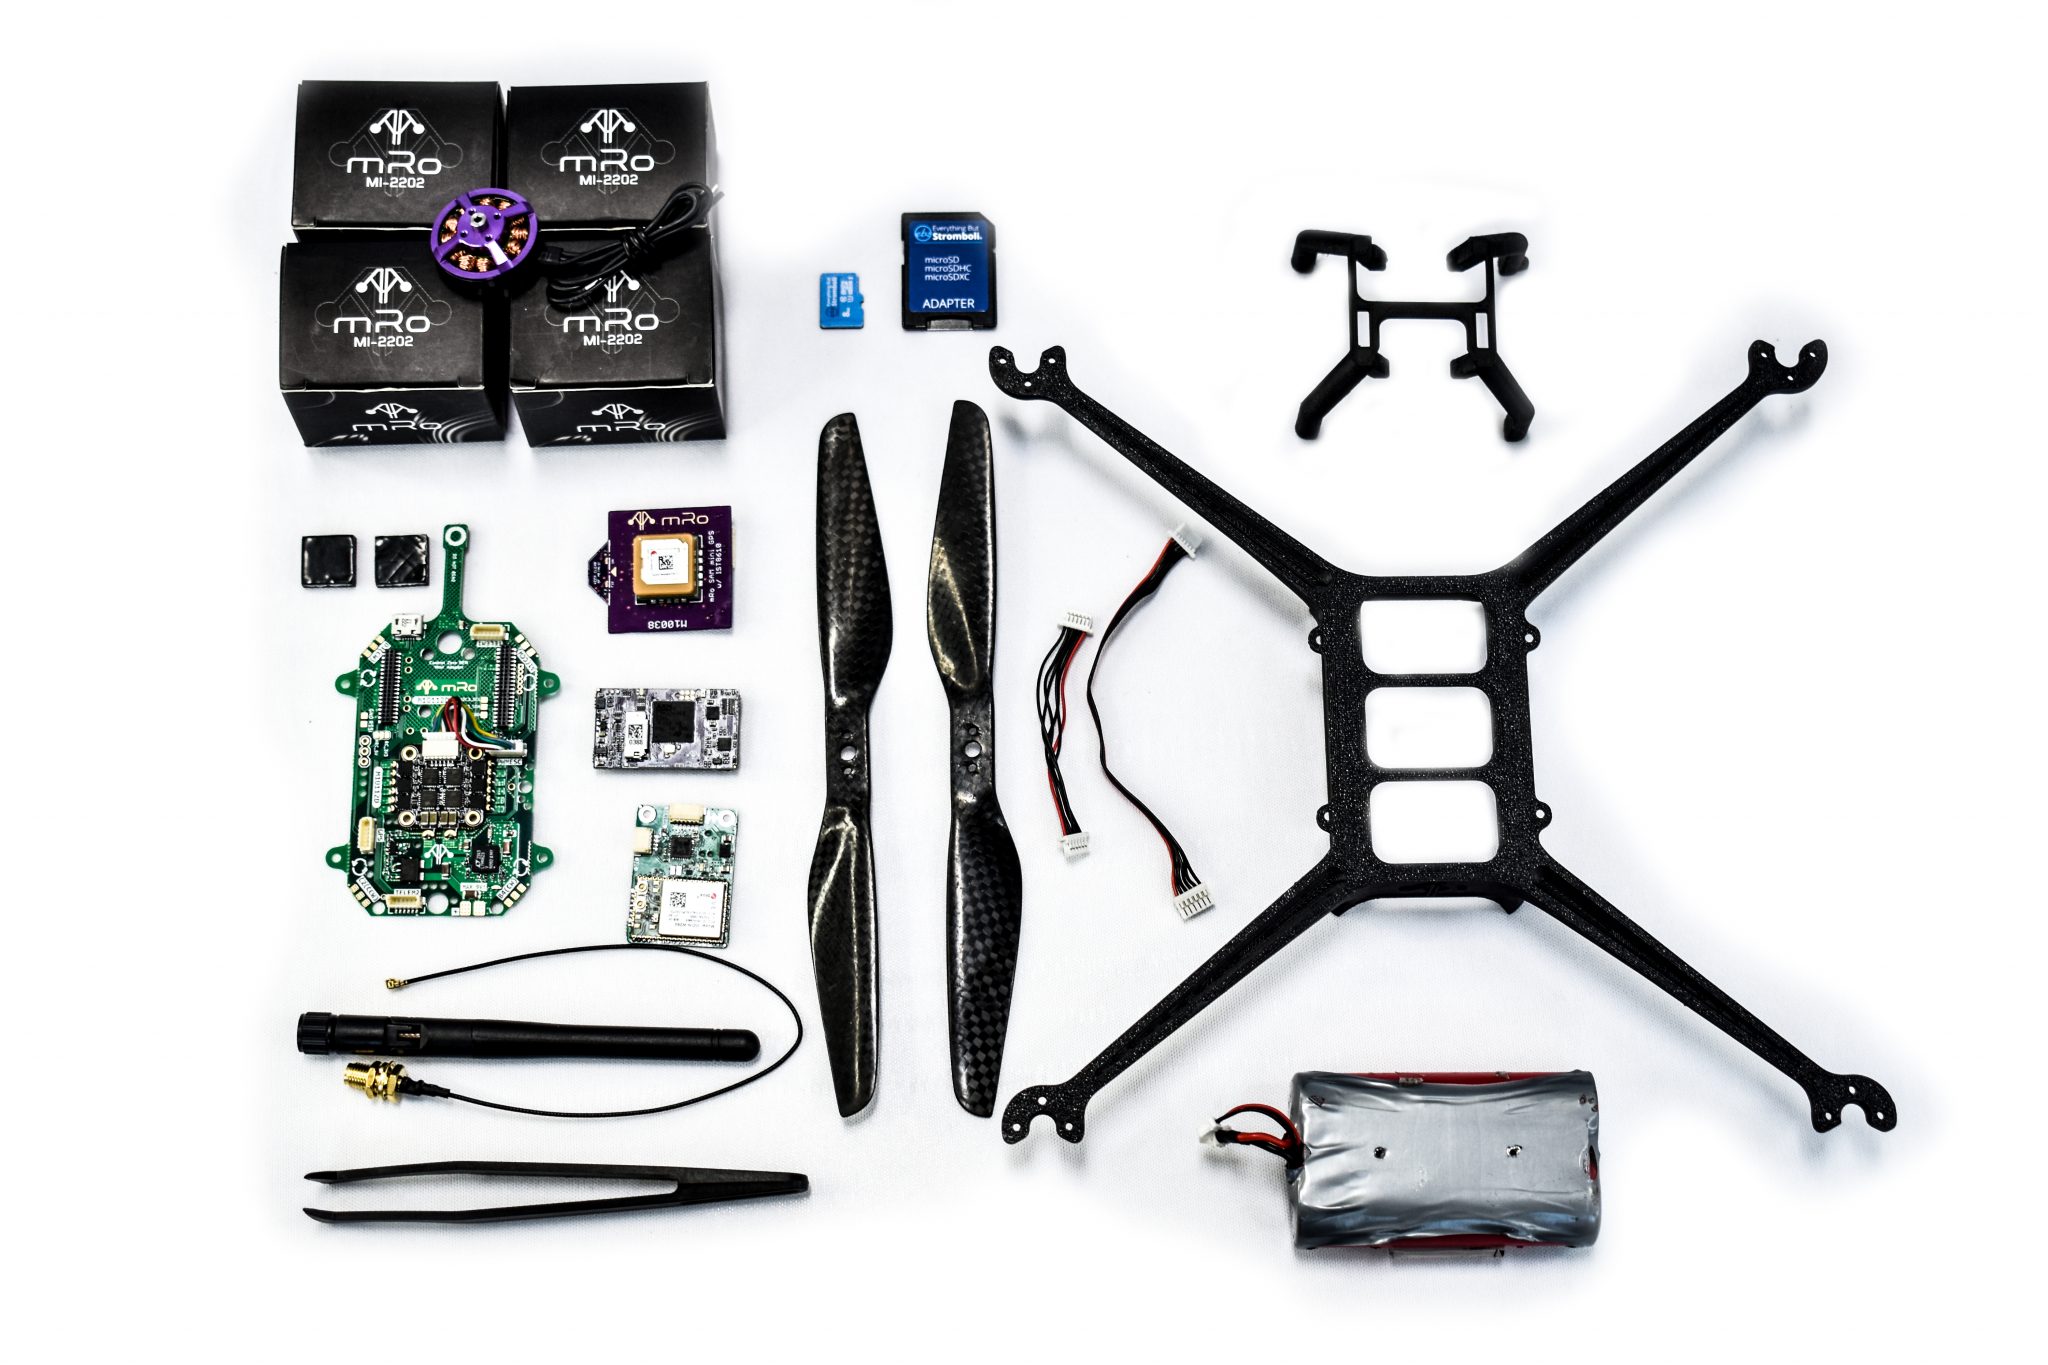
Make sure you have all the parts listed below, if something is missing or you have any questions please do not hesitate to contact us.
-
[ ] Quad Zero Frame
-
[ ] GPS Riser
-
[ ] 4x 2-56x 3/16 Nylon socket head screws
-
[ ] 2x 2-56x 1/8 Nylon socket head screws
-
-
[ ] 4x MI-2202
- [ ] 8x M2x6mm black oxide screws.
-
[ ] 2 Propeller set
-
[ ] Quad Zero carrier board M10112E
-
[ ] 3x MRC-0295 (MRC0243) JST-GH 6 to JST-SH 6 cables
-
[ ] BT2.0 pigtail
-
[ ] 2x ½”x½”x1/10” vibration dampers
-
-
[ ] Control Zero OEM H7 M10059D autopilot
-
[ ] SD Card
-
[ ] Plastic tweezers
-
-
[ ] SAM-M8Q Med size GPS M10038C
-
[ ] FrSky R-XSR radio receiver
-
[ ] Quad Zero 2S 4200mAh battery
-
[ ] XT60-BT2.0 adapter
-
[ ] Balance port adapter (JST-SH 3 to JST-XH 3)
-
-
[ ] If you ordered the optional Dual-Band WiFi Telemetry Radio:
-
[ ] M10114C board
-
[ ] Molex Antenna (black rectangle with sticky back)
-
[ ] 1x MRC-0291 JST-SH 4 short cable
-
[ ] 1x MRC-0292 JST-SH 6 short cable
-
Required tools
-
[ ] M1.5 hex driver
-
[ ] M2 hex driver
-
[ ] Hobby knife
-
[ ] CA glue
- [ ] Accelerator – optional
-
[ ] Soldering iron
- [ ] Solder wire
-
[ ] Double-sided tape – 3M VHB recommended
-
[ ] Prop balancer – optional
-
[ ] Scissors – optional
Extra resources
-
[ ] FrSky D16 protocol compatible transmitter
-
[ ] Ground station hardware – your laptop or a tablet running Mission Planner or QGC
Step 1 – Attach motors to the frame
Materials Needed:
-
12x M2x5mm screws (included inside the motors)
-
4x MI-2202 brushless motors
Take one MI-2202 brushless motor from its box, make sure the rotor can spin freely and screw it in place with 3 previously allocated M2x5mm hex screws with your M1.5 hex driver.
NOTE: Make sure the motor’s wires point down the frame’s arm. See figure below.
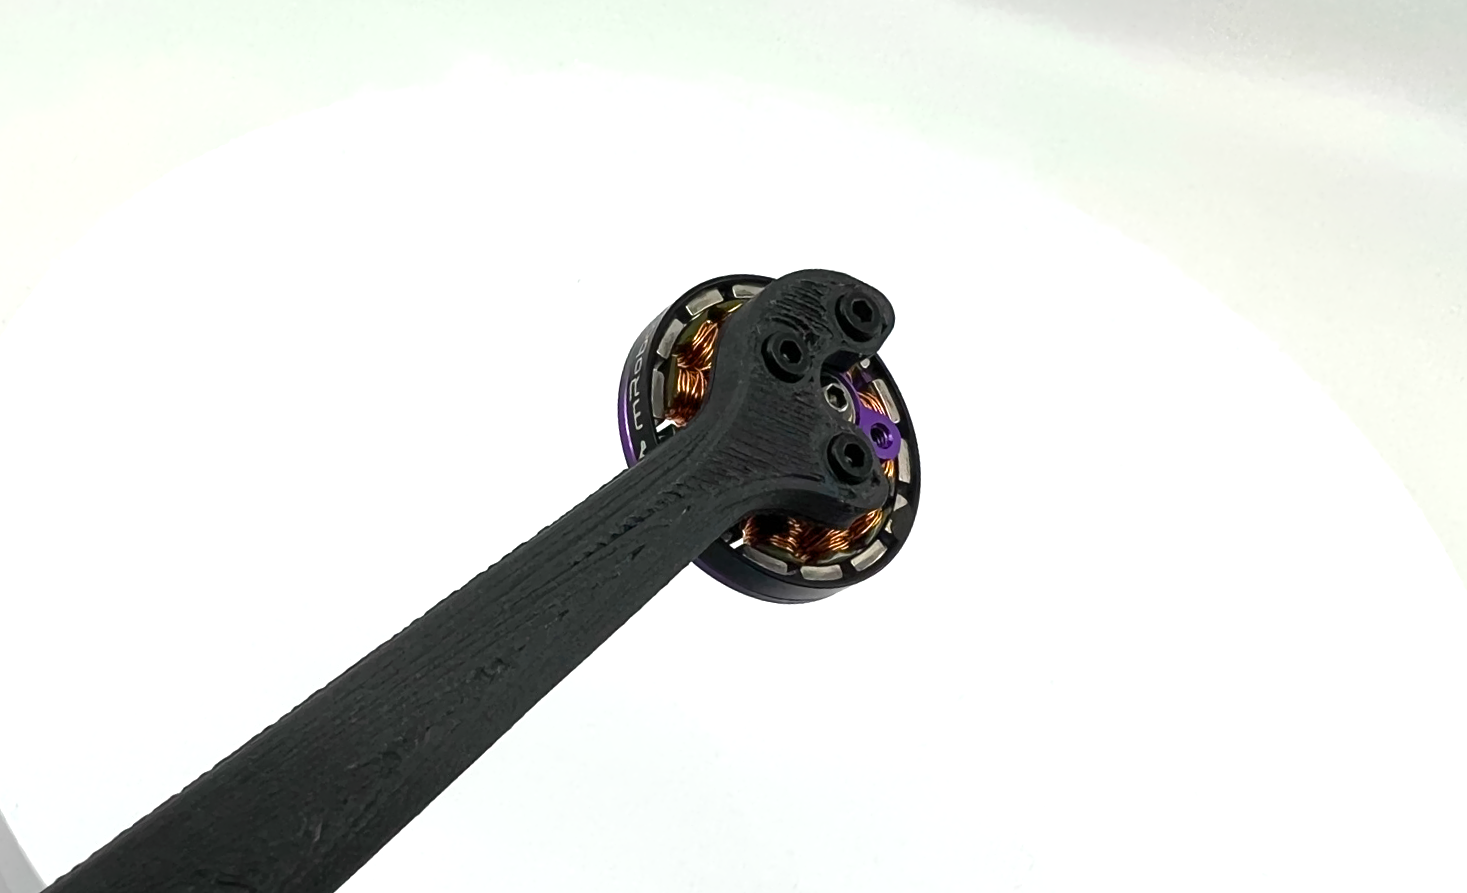
Please do not use Loctite or other similar fluids as these may damage the plastic integrity over time. Repeat the above steps for the remaining 3 arms. Due to the nature of the manufacturing process, your frame may or may not have ‘elephant foot’ artifacts; if this is the case please remove them using a hobby knife.

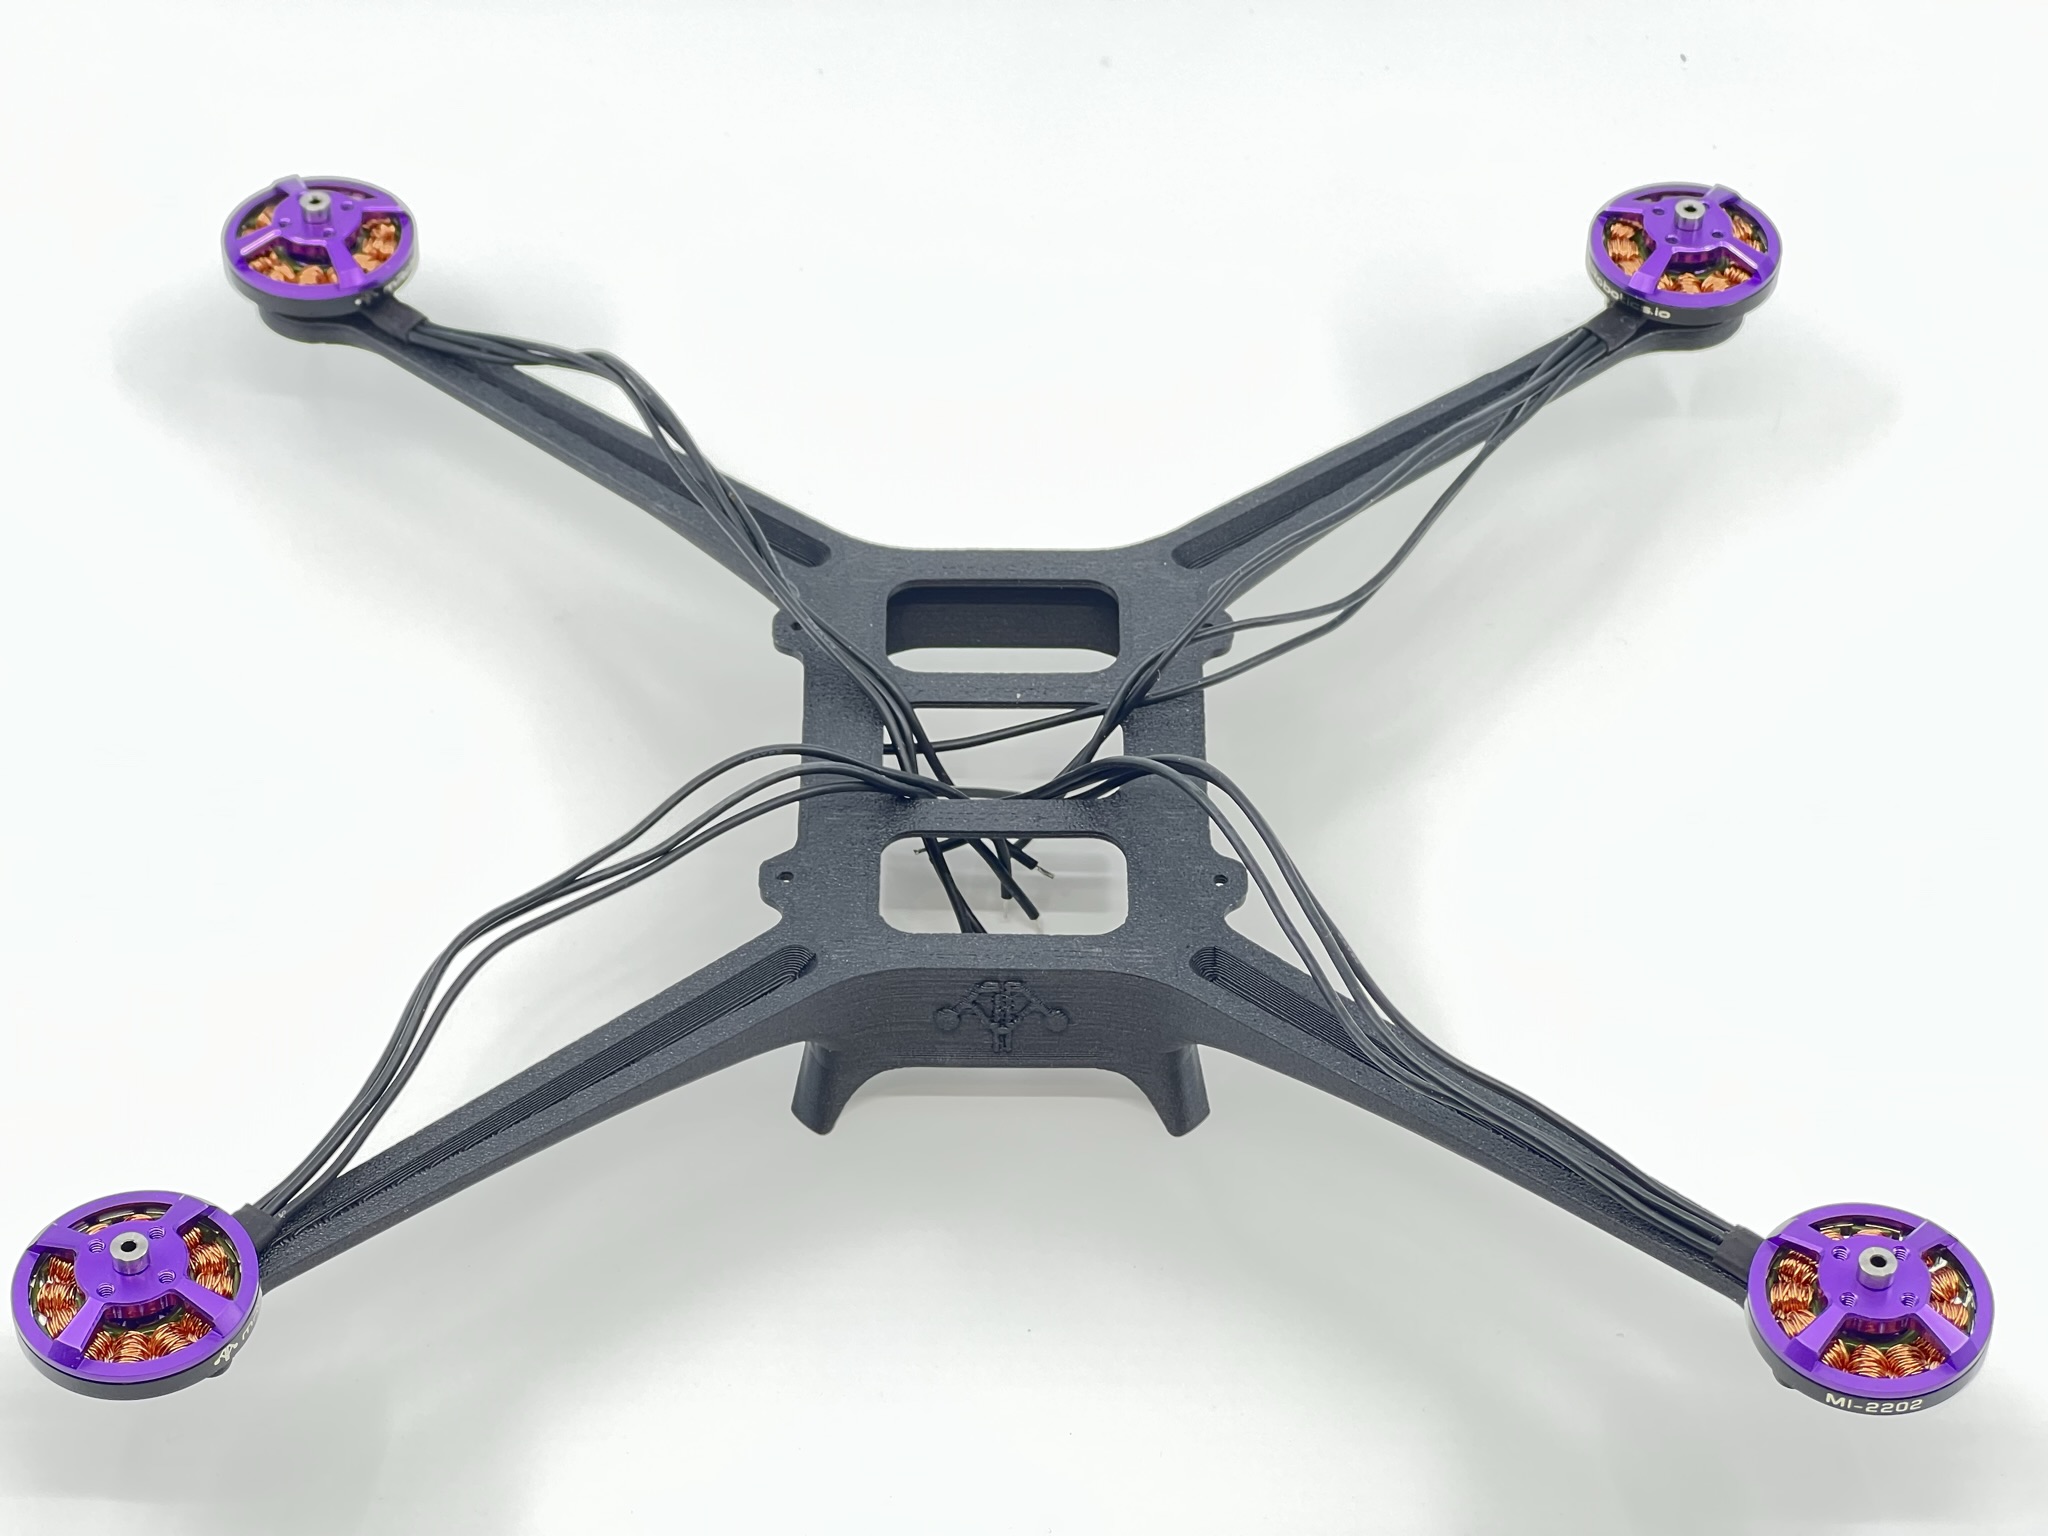
Once you finish placing and screwing all the motors your frame should look something like the picture below.
Step 2 – Carrier board subassembly
Radio RX wire prep
NOTE: We cannot guarantee the firmware version that FrSky or our distributor ship the receivers with, we understand this situation is not optimal for ease of use and are currently working to solve it.
We chose the R-XSR receiver for its flexibility and low weight. Depending on your particular needs you may choose to place it in a different location or not use one at all. In this guide we will cover the standard RC receiver placed on the side of the frame.
The receiver comes with two cable harnesses. Put away the one with the JR connector as you may use it to flash firmware from the transmitter.
Locate the harness with pre-tinned pigtails and remove the white and yellow wires using some tweezers or hobby knife to pop up the latch of the connector housing.
Make sure your connector assembly looks like the picture below. This shows a standard SBUS out connection to the FC, however if you are an advanced user and would like to use the S.Port for telemetry you may adapt these instructions as needed.
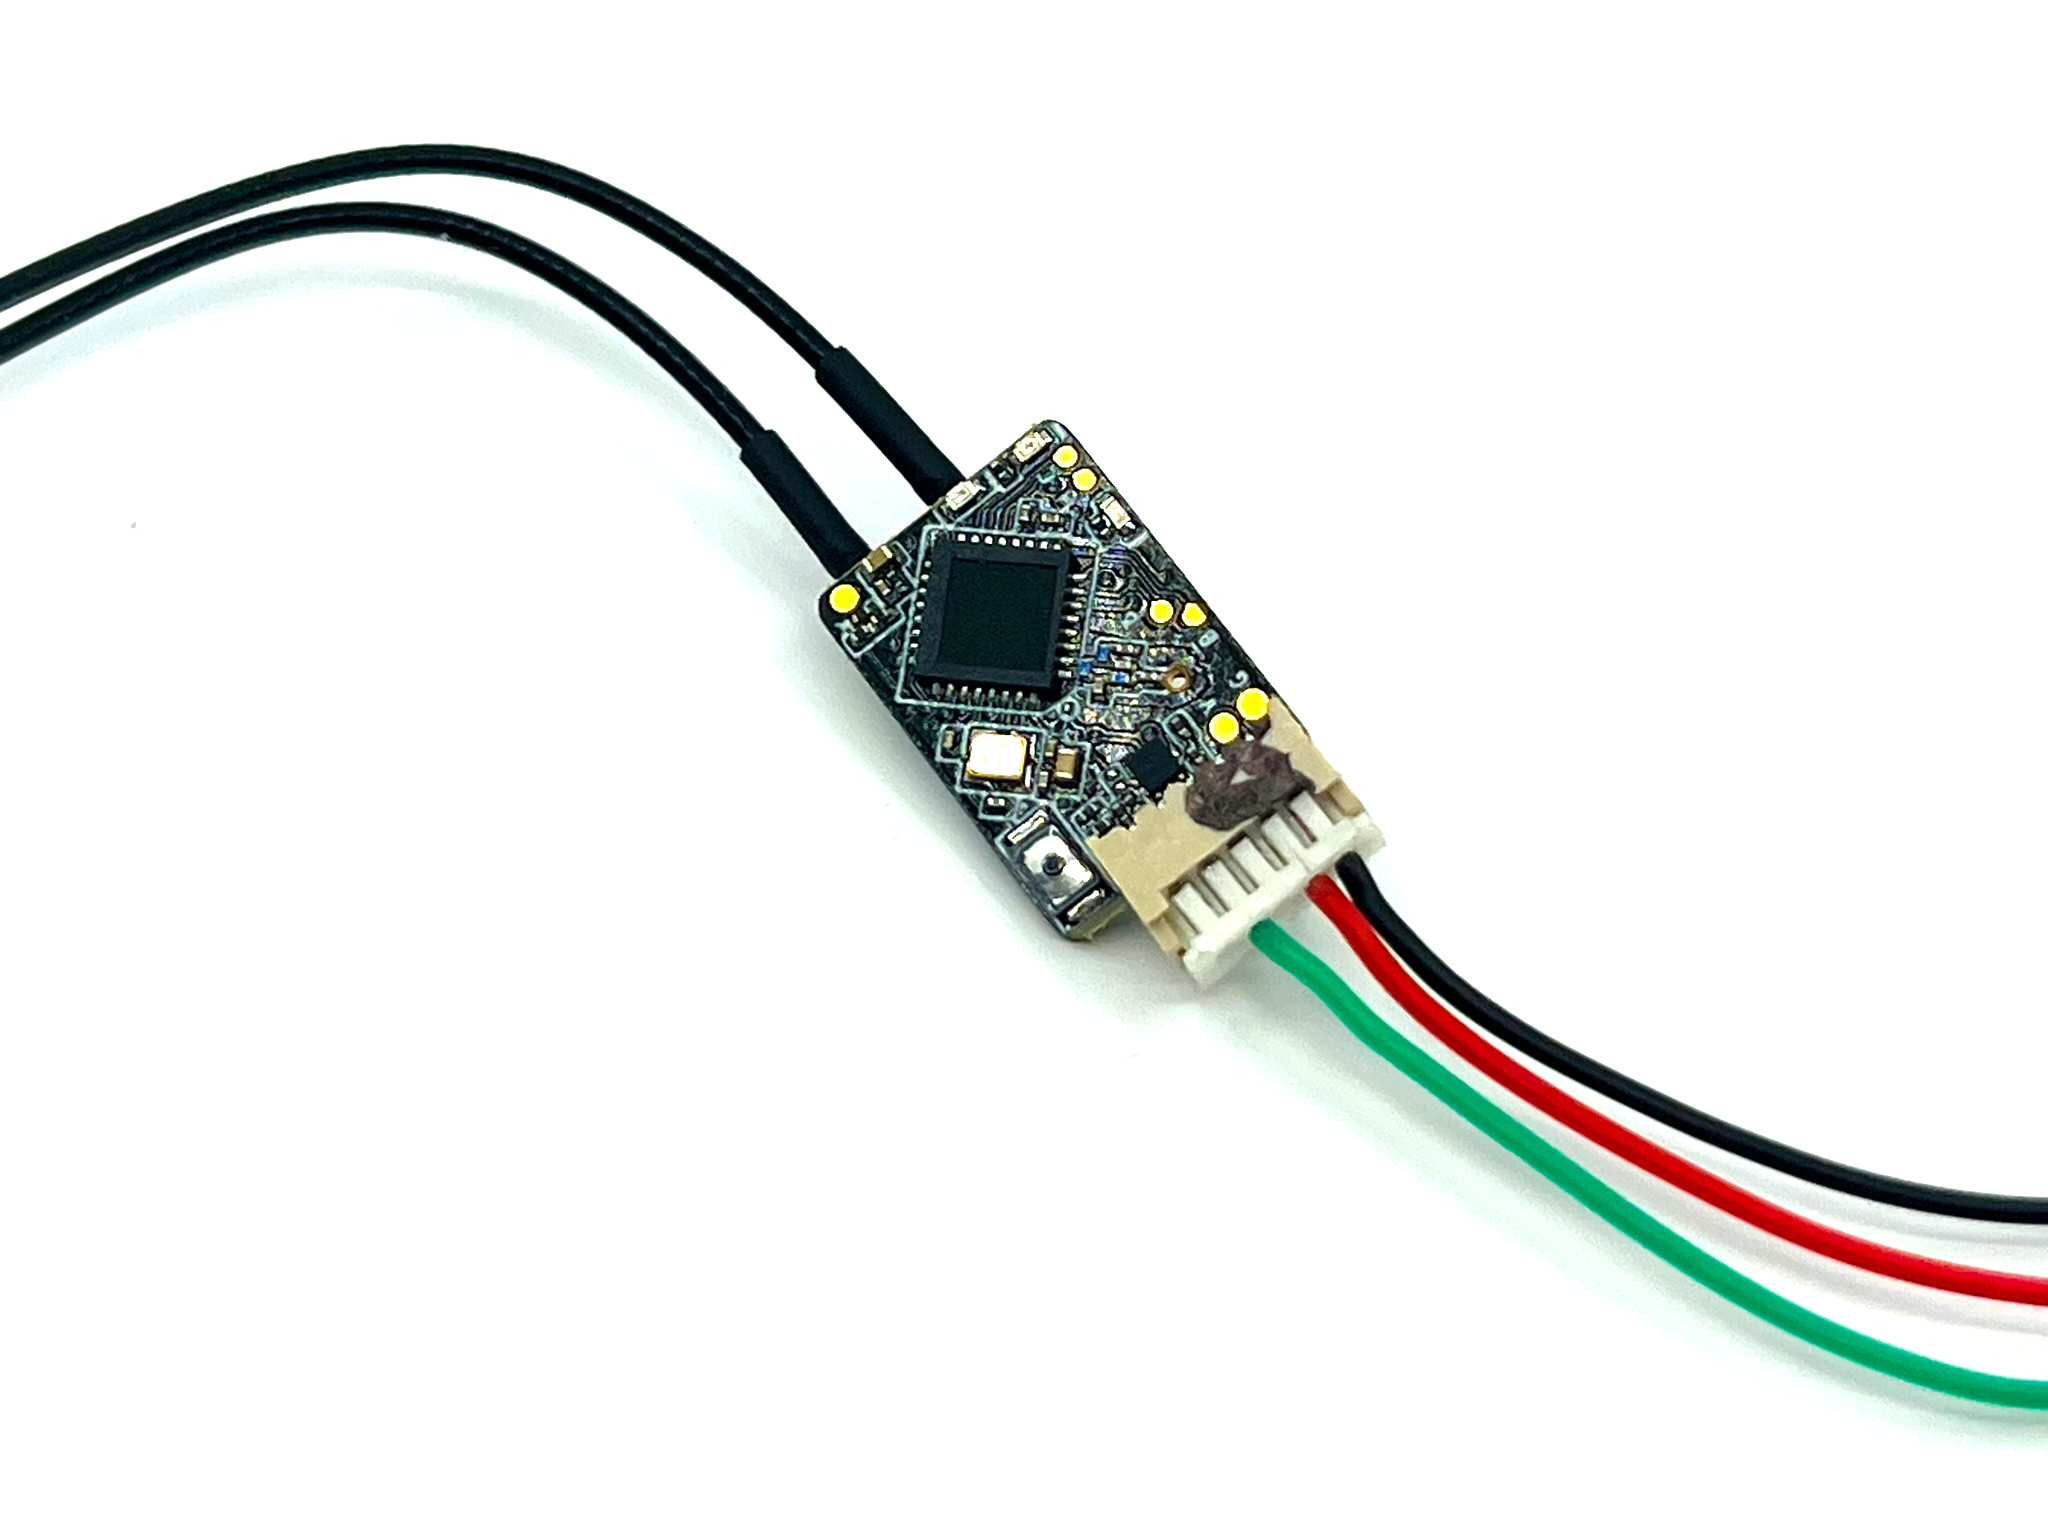
Then, for an appropriate cable management cut the wire length to 26mm or about an inch from the connector housing. Again, if you require to place your radio elsewhere feel free to do so.
Now, cut a piece of double sided tape and put in on the antenna connector side of the board, if the tape is too thin you may stack up 2 or more layers, as needed to get a good flat surface area so it sticks better to the frame. Do not place it yet.
Next, solder the pigtails to the carrier board as described below.
| Color | Carrier pad |
|---|---|
| Black | GND |
| Red | RCV_SEL |
| Green | RCIN |
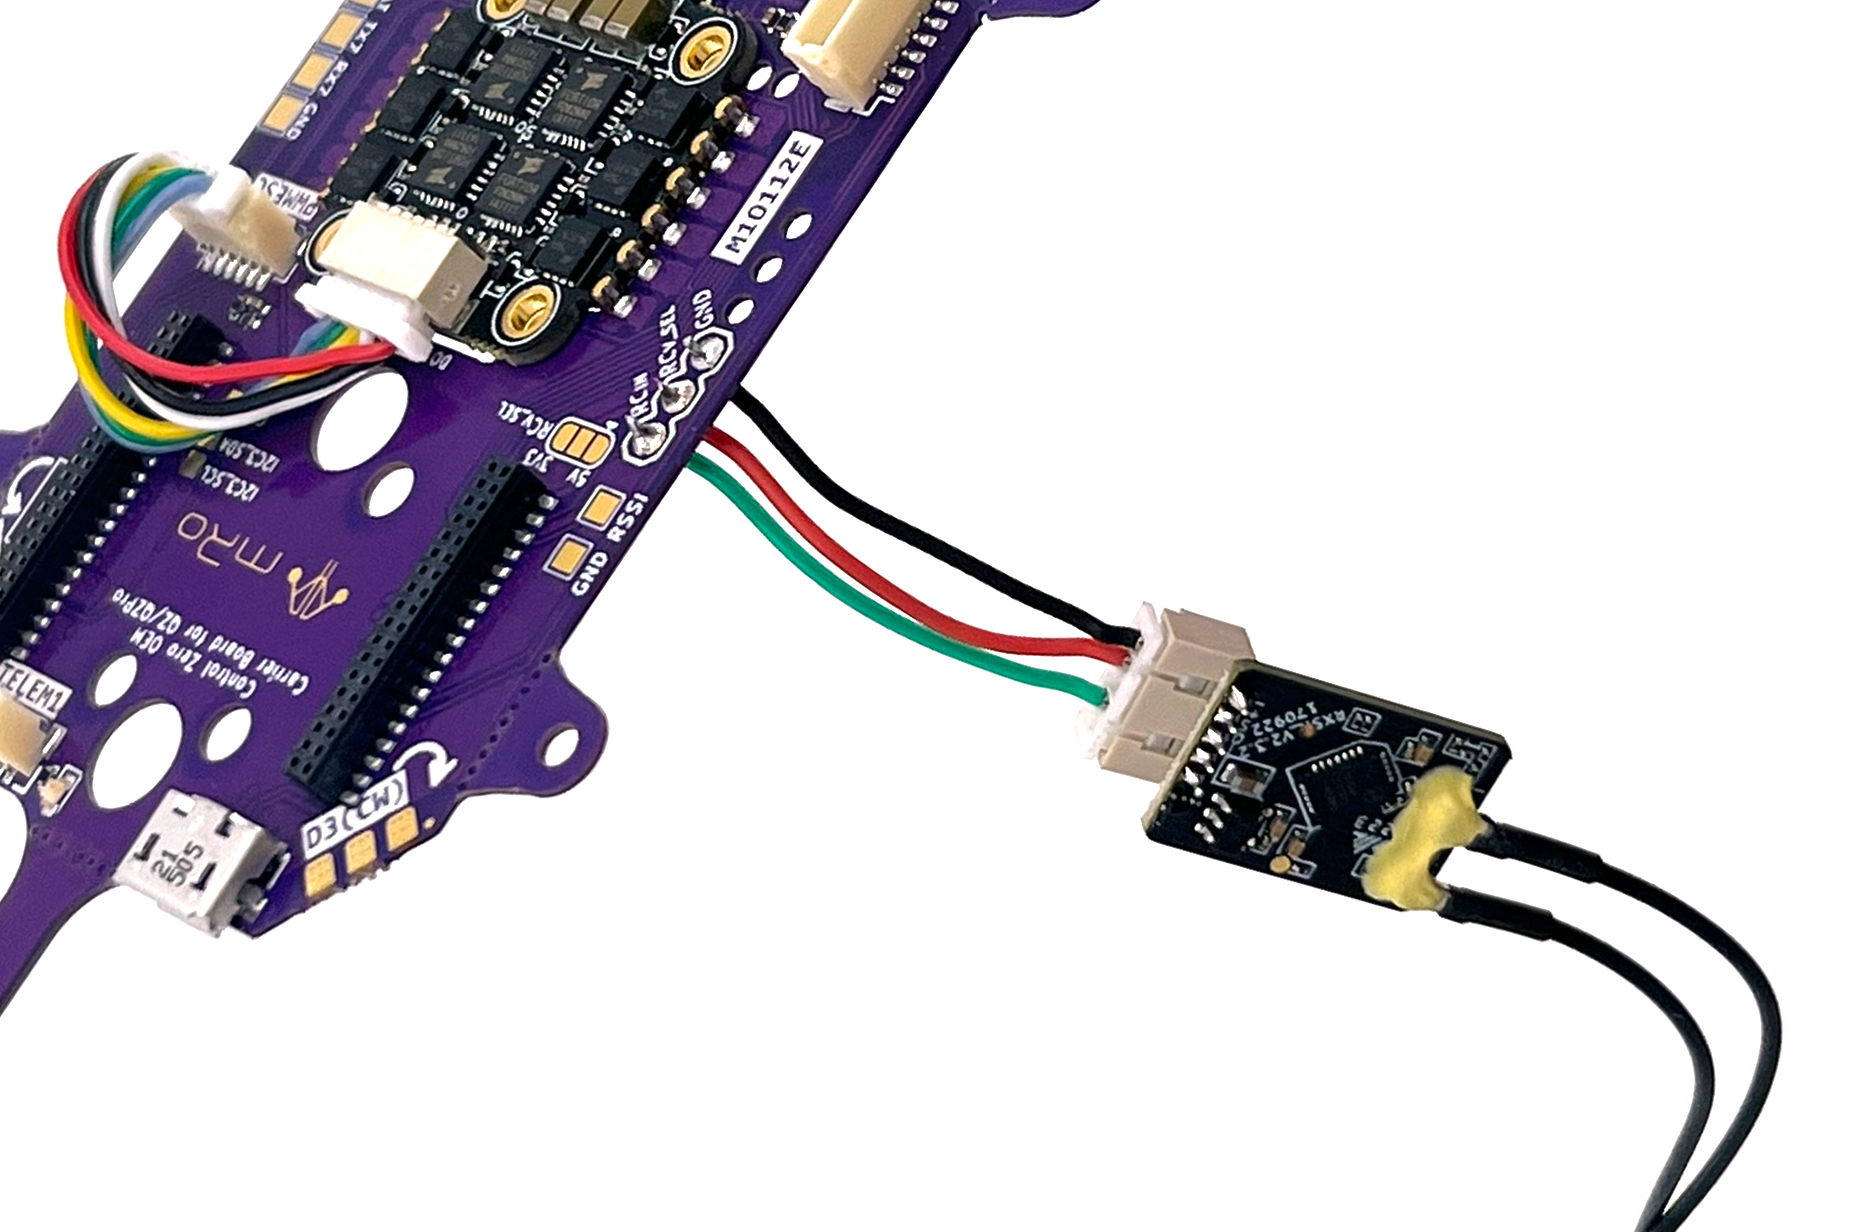
NOTE: If you are using a Spektrum satellite receiver please visit the M10112 carrier board wiki for directions on how to change the voltage and pairing logic.
Carrier board prep
Connect ESC signal cable
Grab the colorful JST-SH 6 to JST-SH 6 cableA]
[INSERT IMAGE HERE]
Vibration dampers
Cut the provided vibration dampening material by half so you end up with 4 small pieces, to do so you may use a hobby knife or scissors.

Remove the plastic cover on one square and place a small drop of CA glue in the center of any square on the carrier board’s back side. Press the square firmly for 10 seconds or until the square no longer slides on the surface.

Repeat for the rest of the corners.
Secure in place
Place the carrier board on its back and remove the remaining damping material adhesive cover.

Add a CA drop on top of each dampening square.

Mount the carrier board onto the frame using the tabs and the side holes to align the carrier assembly. You won’t see the tabs in the GIF below, but we changed the steps order so the alignment is easier.

Press firmly for 30 seconds or until CA has tacked.
Remove break away tabs
To remove the tabs you may use any tweezers or bare fingers. Apply a torque or twisting force carefully along the axis of the dotted line, otherwise you may damage the internal layer stackup of the board.

Step 3 – Soldering
Battery connector
Solder the BT2.0 pigtail onto the battery terminals of the M10112 carrier board. The red wire should match the ‘+’ sign in the board.

Motors
Cut the motor cable in order to reach the carrier board’s motor pads, our small trick to get the wire length correct consists in pulling the wires above the carrier and cut arpund 5-6mm from the edge of the board. Then strip 3-4mm and pre-tin the ends.

Don’t worry for the motor directions at this point, we will verify that using software at a later time. However if you pay attention to detail, you may skip a step later if you solder the front right [A] and rear left [C] motor wires straight (as-is) and swapping any two out of the three wires for the front left [D] and rear right [B] motors. Note: Letters in brackets refer to the corresponding motor as labeled in the carrier board pads.

Motor cable management
This is a recommended step which may be completed with a couple of techniques. In previous versions of this guide we recommended using SuperX glue, however the CA method is faster and cheaper. However using a zip tie, hot glue or similar materials is enough. The goal is to mitigate the vibrations from the cables freely moving under the prop wash and prevent prop strikes.
Once you have all the motors soldered, gently pull the cables from the motor towards the center of the frame and apply a generous drop of CA glue at two thirds of the arm’s length, making sure it covers the cables. Then apply CA accelerator and wait for it to tack.
Step 4 – RF subassembly
You may put the frame assembly on the side for the next section.
We will start this section by opening the bag that contains the Dual Band telemetry radio. Please handle with care and some type of ESD protection, be rigurous on this if you live in a very dry area (<45% humidity).
Allocate the GPS Riser and grab the two 2-56×1/8" nylon hex screws to attach the M10114 Dual Band telemetry radio board to the plastic riser as pictured below.
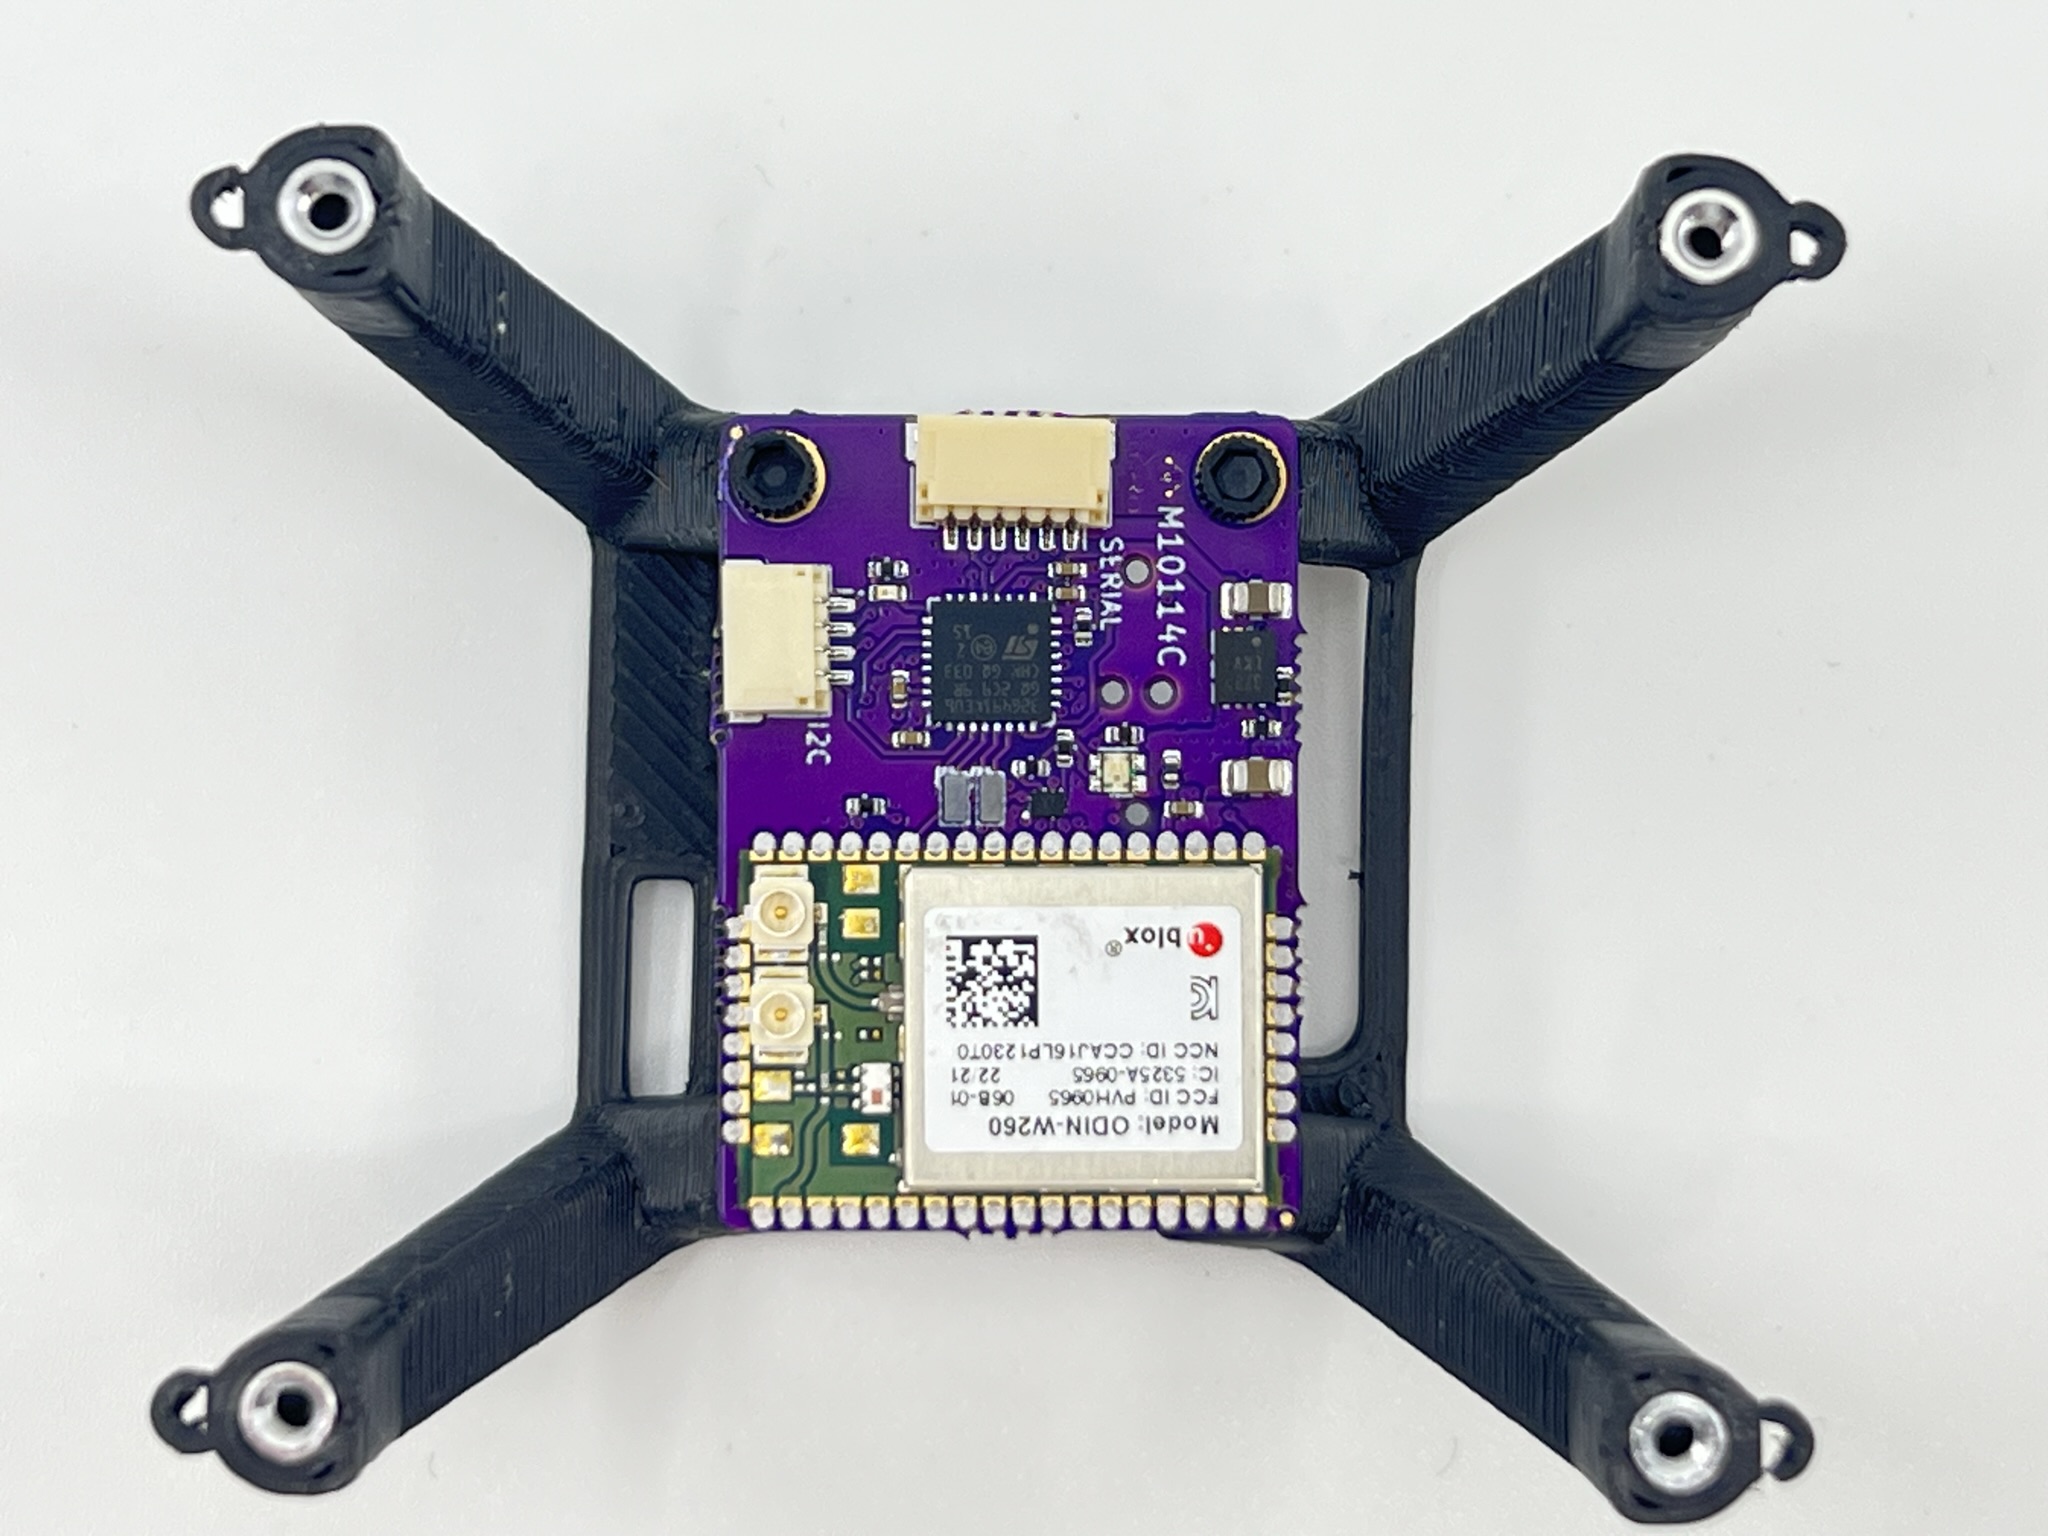
Place a small 9x9mm double sided tape square and place the GPS on top..
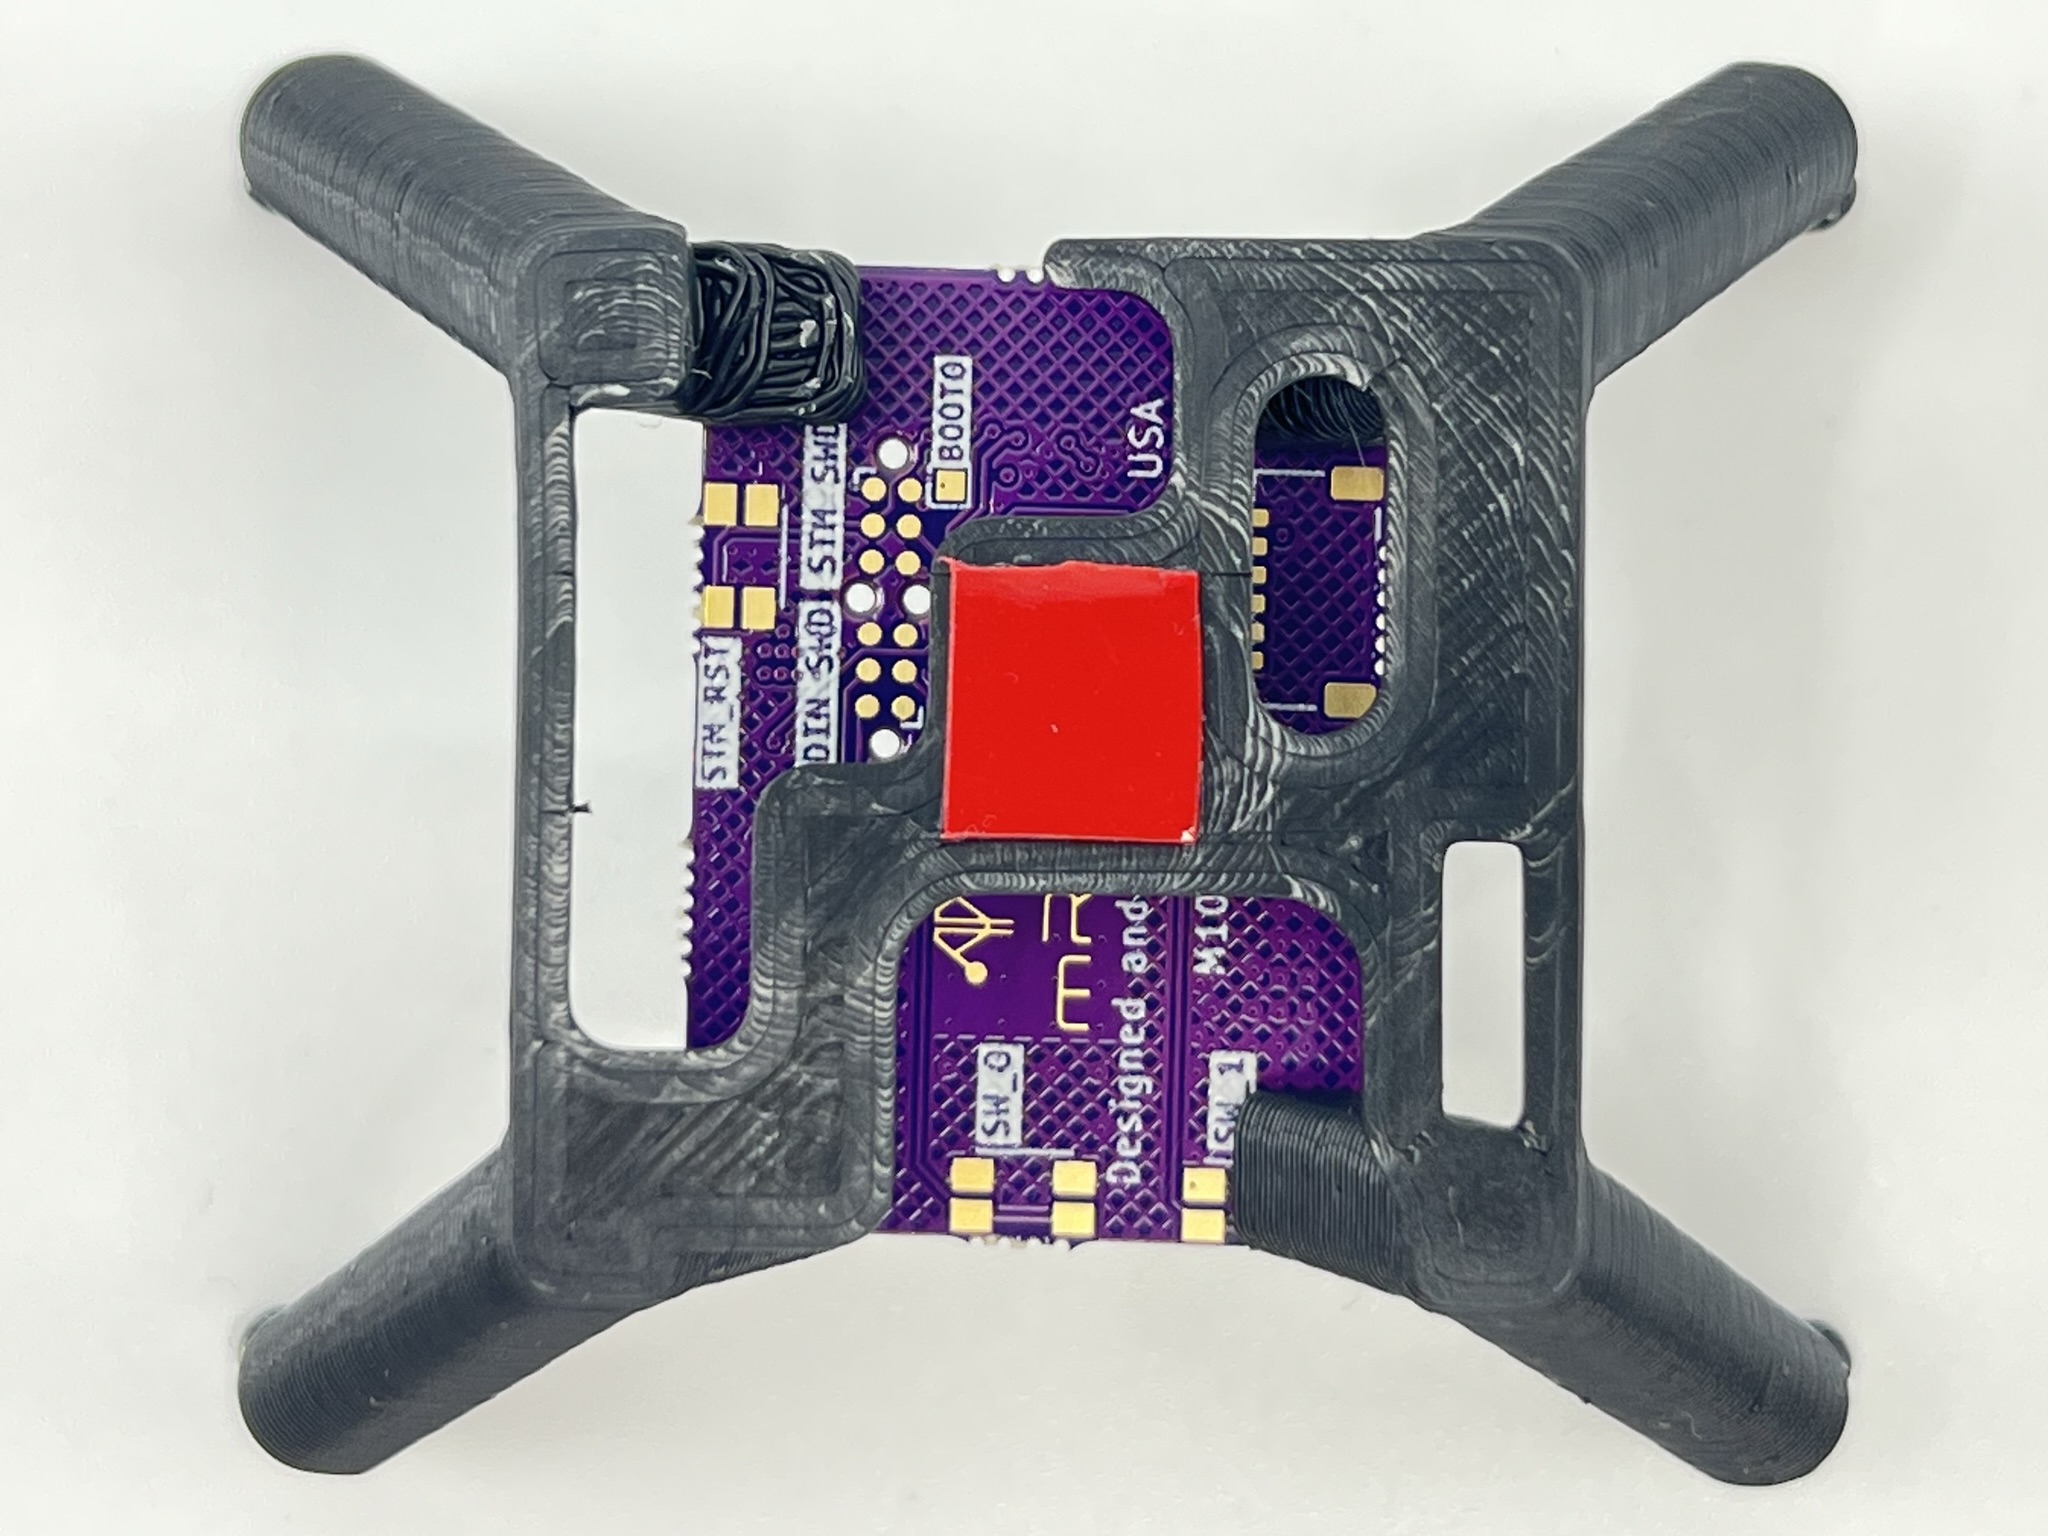
Put flight controller in place
Remove the Control Zero H7 OEM from its anti-static packaging and place it with the arrow pointing to the left of the carrier board, the ToF sensor protrusion is the front direction).
Secure RF subassembly to frame
Make sure the WiFi antenna is gently bent 180 degrees so you are able to place it on the right side of the frame, we suggest securing the GPS riser in place before glueing the antenna. To do so, use 4x 2-56×3/16" nylon hex screws.
See pictures for reference. Use CA glue to strengthen the bond as needed.
Place GIF -video here.
Cable management and component placement
ODIN
Take JST-SH6 to JST-SH 6 cable and connect it to the SERIAL port of the M10114 board (telemetry), then connect it to the TELEM2 port of M10112 carrier board.
GPS
JST-SH 6 to JST-GH 6 GPS cable through TELEM2 and between GPS and telemetry radio cable, then pull connector from the left side to connect it in the GPS labeled connector on the carrier.
Radio RX
If you haven’t already, place a small double sided tape square on the antenna side of the R-XSR radio receiver. Connect its pre-soldered cable assembly, remove the adhesive protection and press firmly for 30 seconds. You may add CA glue to increase the bond strength.
Step 5 – FC Configuration
You will have to evaluate under which flight stack the quad will run. The mRo Control Zero H7 OEM is compatible with Ardupilot and PX4, both broadly capable and stable open source projects. We provide instructions for both platforms with the minimum set of directions and parameter files so your learning curve is a bit less steep if you don’t have a lot of experience, and a faster implementation time if you are a systems integrator.
Ardupilot
The mRo Control Zero H7 OEM board comes with Ardupilot already flashed. Connect your carrier board to any computer running Mission Planner software and update to the latest stable version.
Parameter list
After updating the board, connect via MAVLink using 115200 as baud rate and go to the Settings tab.
Click the Load Parameters button and select [this]() parameter file which should be in your Downloads folder.
Allow once you press OK button (reboot prompt) wait until the beep
Parameters succesfully saved
Should reconnect auto, if not just press disconnect and Connect .
Verify motor order
add Channels to pinout diagram like in M1018 silkscreen.
PX4
Parameters file
Final assembly steps
Props & motors subassembly
Before installing the propellers, we strongly advise to balance them statically. Even if manufacturers label the props as pre-balanced you should double and triple check this fact experimentally.
Install propellers
Use 2 included M2x5mm screws per motor to secure the propeller in place. Loctite is allowed for extra security, however as aluminum is rather
Dynamic balancing
Attempt to describe dynamic balancing
